When it comes to our classic cars — especially at a car show or when being sold at a collector-car auction — a first impression can have a huge impact on performance, from winning an award through bringing the right price across the auction block.

One of the simplest and most overlooked components in our cars is also one that suffers some of the most wear through use: interior carpet.

The carpet is trampled every time you get in or out of the car, and sun fading is a real issue when you use your car in the summer, as most of us do. The wear is incremental — you may not even notice your carpet is looking fuzzy, threadbare and faded, but onlookers (and bidders) will.

Swapping out interior carpet is an inexpensive proposition, and it’s an easy afternoon task that can really make your car’s interior look crisp. Now that winter is here, it’s the perfect time to tackle the job.

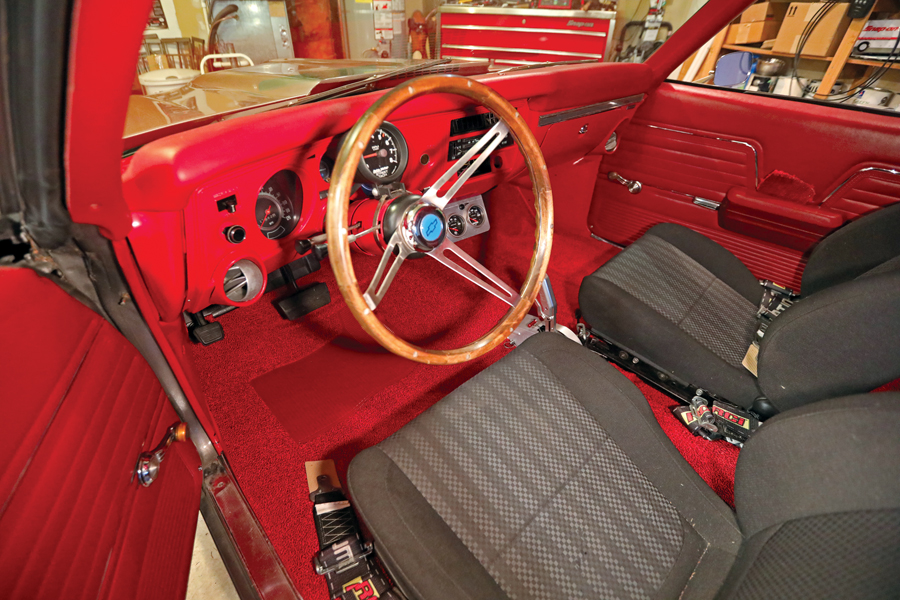
ACC Columnist Jay Harden’s Chevelle is a perfect example of a car in need of fresh carpet. So we contacted Original Parts Group and sourced one of their Auto Custom Carpets “Raylon” carpet kits, which closely resemble the original 80/20 rayon/nylon carpet from the 1960s and 1970s but with more durability and resistance to fuzzing and pilling. It looks stock but will last much longer than an OE kit.

Here’s what it took to get the job done.

Original Parts Group Parts List: P/N ACC26 Raylon-style Original Molded Carpet Kit, Red. $169.99
Time spent: Three hours
Difficulty: 1/5

  1. Jay’s Chevelle still looks pretty good inside, but like many muscle cars that wear older restorations and get used regularly, its carpet kit is faded.
  2. OPGI has carpet kits for a number of GM vehicles. They come rolled up in a box, so the first step, other than verifying that you have the correct color and the correct kit for your application, is to pull the new carpet out and lay it flat to work out any shipping wrinkles. There will be plenty.
  3. Next up is removing the currently fitted carpet kit from the car, but this requires some disassembly. We attacked Jay’s aftermarket seat belts first, which were held in place with four 13/16-inch bolts.
  4. This was originally a bench-seat car. Jay installed aftermarket buckets in the early 2000s and had to make special brackets to fix them to the floor — but stock cars come apart the same way. Four half-inch bolts hold each seat to the floor. We removed the bolts and lifted the seats out of the car.
  5. We pulled the aftermarket floor shifter next, then turned our attention to the original rear seat, which is held in place with two clips welded to the floor.
  6. The seat frame is pinched in place in two spots: one on the driver’s side and one on the passenger’s side. Here we pulled some of the carpet away to show how the clips work — note that the spring steel is grabbed and held in place. To remove the seat, push it toward the back of the car and down at the same time, then lift up and pull toward the front.
  7. Just like that, the rear seat pops out. The side panels and the seatback stay in place, as they’re not in the way here.
  8. With the seats out, you get a better sense of just how faded this kit has become. This is also a good time to note where the front and rear carpet sections overlap, as you’ll want to try to match that with the new kit once it’s installed.
  9. Next up we removed the two step plates on either side of the car. They’re held in place with four Phillips screws each. After that, we pulled the two kick panels under the dash on either side. With the step plates out of the way, the kick panels slide back toward the rear of the car and out.
  10. The last things holding the carpet in place are a few brackets on the firewall — in this case, the throttle pedal bracket and a plastic cover at the base of the steering column. We removed both and set them aside.
  11. With the step plates removed, the kick panels out, and the under-dash components also out of the way, the old carpet kit is ready to come out.
  12. Both the front and rear sections of new carpet come with thick jute padding glued to the bottom. The rear section needs to be installed in the proper orientation, with the padding located in the footwells. Folding the section in half makes getting it in the car easier.
  13. The carpet is molded to fit the floor — but it does take some finesse to get it centered and placed correctly. The idea is to get it to sit flat everywhere, without wrinkles or high spots that stand up from the floor. No glue is required. We did use a heat gun to warm up several sections, as the cold November day was doing us no favors in getting this kit to lie completely flat in the car.
  14. We trimmed the carpet around the two rear seat clips using a razor blade, then reinstalled the rear seat to hold the carpet in place. Note we did not trim the sides to fit — that comes last.
  15. The front section is next, which first must be test-fit in place and marked where it needs to be cut for the shifter cable to pass through it. This is a crucial step, as this car has no console, so a cut in the wrong place would be impossible to hide. We used a black Sharpie to mark the location, then cut it with a razor blade.
  16. With the carpet placed where we wanted it, we went ahead and reinstalled the shifter. To do so, we used a sharp pick tool to locate the shifter’s mounting holes in the floor, stabbing through the new carpet. We then used a razor blade to cut an X over the top of each located hole. That allows the bolts to pass through without creating huge holes in the carpet. Note the wrinkles from shipping, which still need to be worked out before installing the seats.
  17. In the past, I’ve made the mistake of cutting carpet kits too short at the kick panels. This method works great to avoid that — cutting a slot at the corner allows the carpet to lie flat, and the excess is hidden behind the kick panel. Again, we used a sharp razor blade here.
  18. After cutting the passenger’s side carpet to match, we reinstalled the kick panels and then set about marking the seat bolt holes. Again, using a sharp pick tool, we found each hole, then made sure there were no wrinkles, and then stuck small screwdrivers through the holes to keep everything lined up. Again, using a sharp razor blade, each hole got an X cut over the top of it.
  19. Finally, we reinstalled the seats and the seat belts, doing our best to maintain a tight-to-floor carpet fit in the process.
  20. The last step is trimming the sides to fit — I like to trim the carpet right at the step-plate mounting holes, as the plate then has enough bite to really pinch it in place. Four screws on each side finish off the job.

Comments are closed.